
Gaming PCs are the ultimate gaming experience. But they can be costly and difficult to build on your own. If you don’t know how to set up a pre-built gaming PC, then this guide is just for you. In this article, we will show you how to build your own pre-built PC for gaming by piecing together the pieces that fit your budget without compromising quality.
The price of gaming PCs has never been lower. There are many pre-built gaming PCs available for sale, but the best deals are often found through companies like CyberPowerPC and Maingear.
Building a PC from scratch can be time-consuming and confusing. Luckily, pre-built PCs have become a lot more affordable and have the same power as custom-built PC systems. In this article, we’ll tell you how to set up a pre-built gaming PC with the help of some basic instructions.
These instructions are for those who want their system set up by someone else so they don’t have to deal with any difficulties with installing the hardware themselves. If you’re looking for instructions on how to set up a pre-built gaming PC.
What is a gaming PC?
A gaming PC is a computer that has been built with the sole purpose of playing any type of game.
- A gaming PC has a powerful GPU, CPU, and memory that can handle the more demanding games on the market.
- Graphics cards are often used to display video games on a monitor or TV screen.
Should I build or buy a pre-built gaming PC?
Building a computer for gaming has many advantages, including the ability to upgrade individual components. But if you’re not confident in your skills or time-pressed, a pre-built PC is a solid option. Plus, the components are already chosen and you don’t have to worry about compatibility.
It’s not as simple as it may sound to find the right pre-built system from a company like Dell or HP. The cheapest pre-built PC systems are for casual gamers who don’t need a high-quality display.
Midrange systems start at about $1000 and should be fine for most people playing games on 1080p monitors at 60 FPS. High-end PCs can cost over $2000 and come with high refresh rates, high resolutions, and high-quality displays. If you’re not sure what type of PC will work best for you, check out our buyer’s guide here
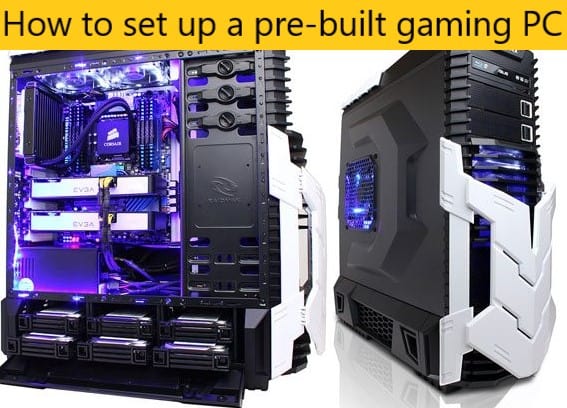
How to Set Up a Pre-Built Gaming PC
Pre-built PC gaming set up for beginners
If you’re new to PC gaming, or if you want to get started with a gaming PC without the hassle of building one yourself, then this DIY guide is for you.
A DIY gaming PC can be expensive and difficult to set up. With that in mind, let’s take a look at our step-by-step guide on how to set up an affordable pre-built gaming PC.
1) Find a pre-built system that suits your needs
There are many different pre-built PCs out there, so it can be hard to narrow down your choices. You’ll need to decide what type of games you’ll be playing on your PC, how much money you’re willing to spend, and whether or not you want any extra features like VR capability.
Some basic specs for a gaming computer that will run most games include an Intel Core i5 processor, 8GB RAM, 1TB HDD/SSD, and an NVIDIA GTX 1050 Ti 4GB graphics card. If you’re wondering about the difference between an HDD and SSD drive, check out this guide here.
2) Choose where to buy your computer
There are many different places where you can buy your pre-built PC from. We recommend buying from reputable retailers because they offer quality products with warranties in case something goes wrong with the hardware later on down the line.
Places like Best Buy have great deals on pre-built PCs bundled with some extras like monitors and keyboards/mice (just make sure they suit your needs)
3) Connect the different parts of the gaming PC
Ensure that there are no packing materials in your gaming PC. If you switch on a gaming PC with the packing material in the CPU, it may start a fire or destroy the moving parts such as the fan.
Then, ensure that all the connectors are connected properly. Even though it is a pre-built gaming machine, you need to ensure that all the parts are connected in the right place. Thus ensure that the connectors are connected fully and are not loose.
Once you have bought the gaming PC, you need to connect the monitor to the PC graphics drive. Moreover, you will need to connect the keyboard and mice to the CPU. All these steps make a gaming PC. Finally, you may need to install the software either using the flash drive or using a CD.
How to connect gaming PC to monitor
The first step is to connect your gaming PC to your monitor. If you have a desktop, this will be easy as it will likely come with an HDMI cable. But if you have a laptop, you’ll need to buy an HDMI cable.
Once you have the right cable, plug one end of the HDMI into your monitor and the other end into your gaming PC. You can also use a VGA or DVI connection if your PC has them available.
4) PC build software install
The next step is to install the PC build software. We recommend using the “PC Build Guide” software that comes with the PC. You need to install Windows again to enable the stability of the gaming machine.
You can use a flash drive or a CD to install Windows. Once you insert your CD into the drive, it should open up automatically. If not, double-click on the My Computer icon on your desktop and go to “Local Disk (C:) > Program Files > PC Build Guide”
You may also need to download the following beforehand:
- Download and install any necessary drivers
- Install anti-virus software
- Create a backup of all your important data
- Uninstall any unnecessary programs or bloatware
5) Install the graphics drivers
You need to install the graphics drivers as downloaded from your favorite browser. This is if your pre-built gaming PC does not come with set-up graphics drivers. This will also ensure you get the best from your gaming PC.
If you don’t have the drivers, then you will not be able to play the games since they depend on the drivers to change commands to an interface you can work with.
The graphics drivers are easy to install as long as you know what you are installing. You can contact a professional in case technology is not your thing.
6) Finally, you need to set up the gaming software that you need
These are the different software that you need for gaming. They include streaming software.
The first software you need is HWinfo. HWinfo is a professional hardware information and diagnostic tool that supports the current components, industry technologies, and standards in PCs. This will enable you to check your gaming PC health and keep it healthy.
You also need CPU-Z software. It is also a monitoring app that enables you to check if everything is working as per the agreed standards.
The other software we recommend is the Steam installer. And finally the OBS studio. The OBS studio enables you to stream your gaming content easily. Once you have downloaded these software, then you are ready to install them.
With this, your pre-built gaming PC is all set up and ready for gaming.
What to do if I want to upgrade the pre-built PC?
What You’ll Need
- Motherboard
- CPU
- Memory
- Graphics card
- Hard Drive
- Case
- Power supply
How to Install the Motherboard
The first step is to install the motherboard. The motherboard should be installed in the top left-hand corner of your case, where there are four standoffs that the motherboard screws into.
Next, you’ll need to put in the CPU. This will go into a socket on the motherboard that looks similar to an upside-down U.
The CPU has pins on one side that you’ll need to line up with holes on the motherboard. Then, insert them so they’re flush with the board and tighten them by turning them clockwise until they lock in place.
Next, you’ll need to install memory or RAM into slots on the motherboard labeled DDR4-SDRAM. Each slot is labeled with a number followed by two letters, AM4 for example. If you have two sticks of RAM then it should go into slots that are next to each other, but if you have four then they can go into any of those slots as long as they’re labeled DDR4-SDRAM.*
Now it’s time to install your graphics card! Your case should have an area where it can be screwed in or clipped in with some rails. You’ll want to make sure it matches up correctly with the corresponding graphic card port on your motherboard, which might be labeled PCI Express x16 (or PCIe).
You’ll want it oriented so the open end is closest to your RAM and/or hard drive bays if possible because this will allow for better airflow inside your case.
Installing the Hard Drive
The first thing you want to do is install the hard drive. Remove the side panel and look for the motherboard tray. The motherboard tray has a space for your hard drive, which should be labeled ‘Hard Drive Slot’.
Take out the screws on either side of the slot. When you pull out the tray, it will have loops with screws on them. Screw in one side of your hard drive’s screw loops, then use the other to screw in the other side of your hard drive’s screw loops.
Wrap your fingers around the sides of your hard drive and gently pull up until you feel it snap into place. Make sure there are no loose screws left behind.
Replace the cover on your computer case and put all of the screws back in the place where they were before. Your hard drive should now be installed!
Installing Memory
One of the first steps is to install the memory. This can be a little tricky since you have to feed the wires through a hole in the motherboard.
Grab a memory module and line up the notch on the side with a notch on the slot on the motherboard. Squeeze it firmly into place and then use your fingers or an open-end wrench to turn it clockwise until it’s snug.
There are different memory sizes you can install on your gaming PC. However, we recommend getting a memory of at least 8GB. This will enable you to play the current games without a lag.
Installing a Graphics Card
The first thing you’ll need to do is install a graphics card. This will handle the rendering and output of your games and videos. Find the PCI-E slot on your motherboard and insert the graphics card into it.
When you’re inserting the card, make sure to hold down the metal bracket at the end of it until it clicks into place. You can then turn on your power supply and continue with installing other components such as hard drives, optical drives, and memory.
If you don’t get a good graphics card, you will end up with a poor gaming experience. The gaming GPU gives you the visual experience and thus the more advanced the card, the better for your gaming.
Installing a Power Supply
Below are the steps for installing your power supply.
- Position the power supply next to the case and connect the 24/20 pin connector to the motherboard.
- Connect the 8-pin connector to the motherboard.
- Connect 4 long cables to their respective positions on the power supply ensuring they plug in all of them securely.
- Then, connect one or two cables with a 6 or 8-pin connector to their respective positions on the graphics card.
- Thereafter, connect one or 2 cables with a 6 or 8-pin connector to their respective positions on other video cards if you have them installed.
- Connect any remaining long cables from one end to their respective positions on the power supplies ensuring they are securely plugged into place.
Installing a Case
The first thing you’ll need to do is install your case. Depending on the brand and model, this will involve plugging in your PSU and then sliding it into place.
Screws may need to be tightened, and cable management may need to take place before closing the case and installing any fans if you’re using a fanless case.
How to Install a Case Fan
A case fan is one of the most important components in a pre-built gaming PC. Installing it is relatively easy, but there are some steps you need to follow.
First, you need to decide where you want to install your case fan. Your best bet is usually the side panel on the other side of the motherboard so that it can get fresh air from outside.
Next, you’ll need to remove the side panel on the other side of the motherboard so that you can access the screws holding it in place.
With those two steps complete, there should be three screws lined up near where your case fan will be installed. Remove them and then slide your case fan into place with its screws facing down towards the motherboard.
Once your case fan is in place, screw all three of its screws back in securely and replace the side panel on top of it. Make sure both panels are aligned correctly before reattaching them with their respective screws.
How much does a pre-built PC cost?
If you would like to build your own PC, it can be expensive. If you want to customize everything about your system, you’ll need to purchase every piece of hardware separately and assemble them yourself. On the other hand, pre-built PCs are readily available for purchase and ready to use right out of the box.
You will need to make sure that the PC is compatible with your needs. This means making sure that the keyboard, mouse, monitor, and speakers are all compatible with one another.
While most pre-built gaming PCs come with monitors and keyboards, they may not come with speakers or a gaming mouse. You’ll also need to make sure that the graphics card is compatible with your monitor’s resolution.
Pre-built PCs may cost more than purchasing each component separately but also offer convenience in terms of assembly and compatibility issues. Generally speaking, they cost around $1000-$1200 USD for a good quality pre-built PC with decent specs (like an Intel Core i7 processor).
The costs can range depending on the PC’s specifications as well as how much RAM it has (RAM typically ranges from 4GB – 16GB).
Conclusion
You’ve completed the build of your gaming PC! Congratulations. Now it’s time to power it up for the first time.
The last step in this guide is to install the power supply, which should be located at the top of your completed PC tower. The cables will be coming off the other side of the motherboard, so flip the motherboard over and set it on its other end.
The cables are labeled, so match them up with the corresponding plugs on the power supply, and plug them in. Lastly, plug in the power supply’s power cord to an outlet and turn it on.
If all goes well, you should see your PC turning on. You’ve successfully set up a DIY pre-built gaming PC.
FAQs
What are the advantages of a pre-built PC?
There are many advantages to buying a pre-built PC. For starters, they’re often more affordable than building your own computer. You also don’t have to worry about shopping for each individual component on your own – all the components are already included in the system. A good pre-built PC will provide you with enough power to play most games on high settings with ease. Finally, if you’re not too tech-savvy yourself, it’s much easier to just buy a pre-built computer than build one from scratch.
What is required before setting up my PC?
Before you reach for your screwdriver and start assembling your new PC, there are some things that need to be done beforehand:
-Download and install any necessary drivers
-Install anti-virus software
-Create a backup of all your important data
-Uninstall any unnecessary programs or bloatware (though these features may come with an OEM package)
How do I know if my pre-built PC is compatible?
You can find out what is compatible by either reading through the manual that comes with the computer or by visiting our compatibility guide.